Did you ever wonder, how it is possible to reveal faint objects in the night sky?
I get this question quite often from people when they find out that I dabble in astrophotography. Certainly, everyone has seen images from telescopes like Hubble or the James Webb Space Telescope. But, do you really need a NASA-grade telescope to explore the night sky?
The reassuring answer is: No!
One of the things that got me hooked on astrophotography was the fact that anyone can take images of the night sky with even modest equipment.
In fact, if you own a device that can take pictures (and nowadays, that’s essentially anyone with a smartphone), you’re already able to take your first steps into this fascinating world.
What is Astrophotography?
Astrophotography is the art of capturing images of celestial objects like stars, planets, galaxies, or the moon using cameras and telescopes. It allows us to see details that are invisible to the naked eye—like the swirling arms of a galaxy or the fiery glow of a nebula. It’s a perfect blend of science, art, and technology. To succeed, you’ll need to know not just what you want to photograph, but also how to best compose and process the image, and which tools to use to achieve the best possible results.
How Does It Work? The Basics
First off, deep-sky objects are incredibly faint—extremely faint. Fortunately, modern camera sensors are very sensitive and can capture light much more efficiently than our eyes.
Here’s a fun fact: our eyes, specifically the retina, are covered with specialized cells that pick up light and transform it into electrical signals. These signals travel through our optic nerve into the brain, which decodes and reconstructs an image. It recognizes objects, movement, and even assigns emotional attachment to what we see (think of the joy of seeing a loved one or a slice of pizza).
But why is it that we can’t see colors well in the dark? The photoreceptors in our eyes are divided into two types: cones, which are sensitive to colors (more precisely, certain wavelengths of light), and rods, which are sensitive to light intensity but not color. In the dark, our cones have trouble working, so our rods take over the heavy lifting, even though they can’t distinguish color.
This is unfortunate, because the night sky is far more colorful than most people realize. However, it’s faint and often obscured by a blanket of light pollution. For instance, Europe is one of the most light-polluted regions in the world. Even in remote places like the Swiss Alps, light pollution is still present. Small villages and cities like Milan to the south and Zurich to the north light up the sky, diminishing the joy of stargazing.

The Key to Great Astro Photos: Exposure Time
The most crucial concept behind a good astro image is the time spent collecting photons from the deep-sky objects. Unlike regular photography, astrophotography involves long exposures—keeping the camera’s shutter open for several seconds, minutes, or even hours to collect enough light.
As you can see in the image above, a single 5-minute exposure of the Orion constellation reveals much more detail than the naked eye could ever see.
The next step is to combine multiple exposures together using specialized software. By averaging these images, you significantly reduce the camera noise while boosting the signal. The more images you collect, the better the signal-to-noise ratio. This is also evident in the stacked image of Orion, where 100 images of 5 minutes expore each were combined together. A lot less noise is visible and the dark dust is much better resolved and visible.


The Tools You Need
At the very least, you’ll need a camera (even a smartphone will work). Ideally, you’ll also want a tripod to provide steady support for your camera—handheld shots, even for just a few seconds, will result in shaky and blurry images.
Next, you’ll need an appropriate lens or, if you already have one, a telescope. The good news is, astrophotography is not about the zoom. Almost every focal length has its place, each with its unique limitations and drawbacks.
Understanding the 500 Rule
Your camera’s focal length will dictate how long you can expose your image before you start noticing the Earth’s rotation. Yes, you read that correctly: the Earth spins so fast that its movement quickly becomes visible in your images as elongated stars. The longer the focal length, the shorter your exposure time needs to be.
There is a simple formula known as the 500 Rule that can help determine the best exposure time:
Exposure Time = 500 (Crop Factor × Focal Length)
Crop Factor refers to the size of your camera’s sensor compared to a full-frame camera. For example, the crop factor for a typical APS-C DSLR is 1.6, while for an iPhone camera (currently using the iPhone 16, for instance) it’s about 3.7.conds.
Exposure Time Tool
Example Calculations
For instance, if you have a 14mm lens and an APS-C DSLR, you can expose up to 22 seconds before noticing star trails. On the other hand, with a 400mm telephoto lens, your exposure is limited to 0.78 seconds!
Practical Tips for Astrophotography
If you're using just a camera and tripod, you may soon find the limitations of the 500-rule formula. But don’t worry—I encourage you to head to a dark-sky location, set up your camera, and shoot as many pictures as possible. Here are some tips for a successful night of astrophotography:
- Reposition your camera every few minutes, depending on your focal length. The longer the focal length, the more frequently you'll need to move your camera.
- Use an intervalometer—it allows you to set the number and duration of exposures. These devices are inexpensive and cost around 20 CHF or USD.
- Set your camera to manual mode and open the aperture to the smallest f-number possible.
- For focusing, find a bright star and increase the ISO to 6400 or higher. Zoom into the star on your display and adjust until the star is as small as possible. This is your "infinite focus."
- Adjust your ISO to 1600 or 3200 for cleaner images, then start shooting.
Processing Your Images
The magic of astrophotography often happens in post-processing. After a night of capturing light, you’ll use software such as Siril to stack and process your images, combining them to reduce noise and enhance detail.
Calibration Frames:
- Flats: Correct vignetting (use a white cloth and screen).
- Bias: Remove sensor noise (shoot in complete darkness).
While dark frames (to remove thermal noise) are helpful, they’re less critical for modern DSLRs.

The Next Step: Star Trackers
After capturing your first astro image, you may want to take your astrophotography to the next level. The next logical step is investing in a star tracker—a device mounted on your tripod that rotates your camera to match the Earth's rotation. This device allows you to take longer exposures without worrying about star trails.

To ensure accurate tracking, you’ll need to polar align your star tracker—meaning it should be pointed toward Polaris (the North Star). The tracker moves at the same speed as Earth's rotation, which keeps stars round in your images.


The difference between untracked and tracked images is noticeable. With a star tracker, you can increase your exposure times and capture far more detail in your images.
As you see, using a star tracker enhances the quality of the images noticeably. I still use it regugarly when I travel as it is quite light compared to a full fletched telescope. This image for example, was taken in 2024 in the Saharan Dessert of Marocco and even got me an Image of the Day Award on Astrobin. It is also just an hour of exposure using a 135mm lens and mirrorless camera.
Are astrophotographs even real or is it all just photoshop?
Many people ask, “Are astrophotographs even real, or is it all just Photoshop?”
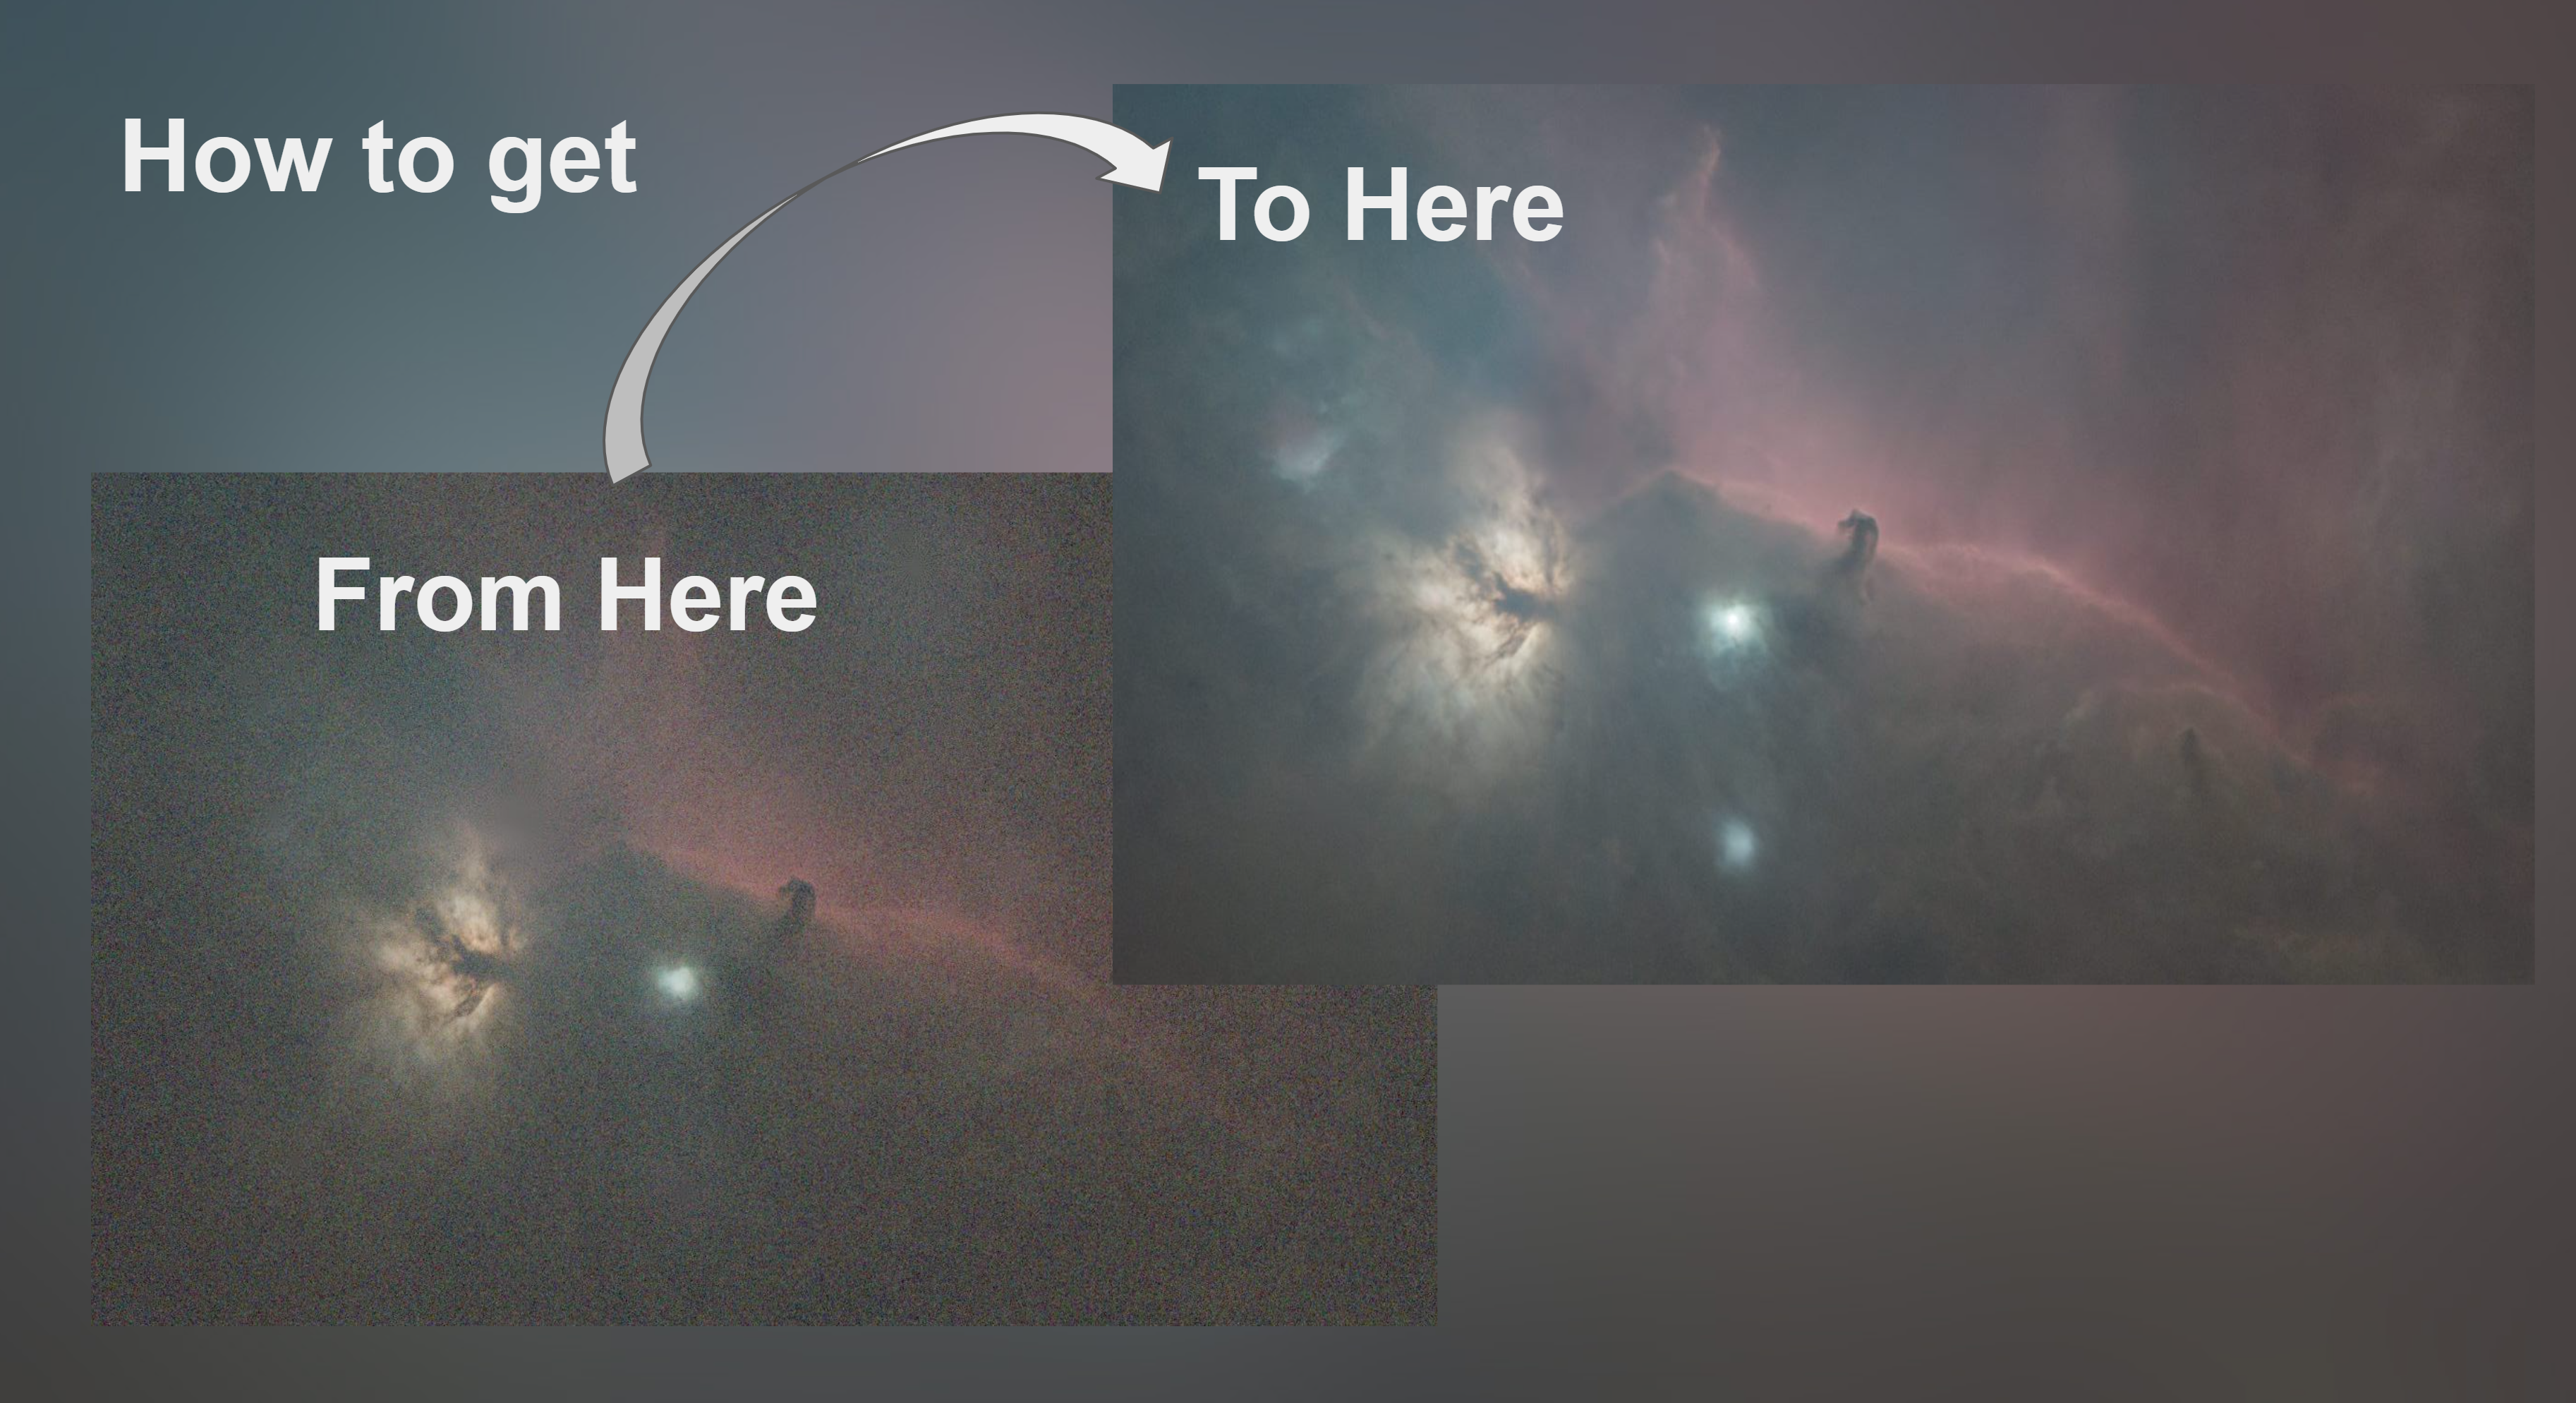
Astrophotography often requires post-processing using specialized software like Photoshop and other tools to bring out hidden details in the faint signals we capture. This may include enhancing nebulosity, balancing noise levels, and even creating starless images to highlight certain features.
An example of such a process:


This is a small crop of the signal coming from Oxygen gas contained inside a supernova remnant in the Cygnus constellation.
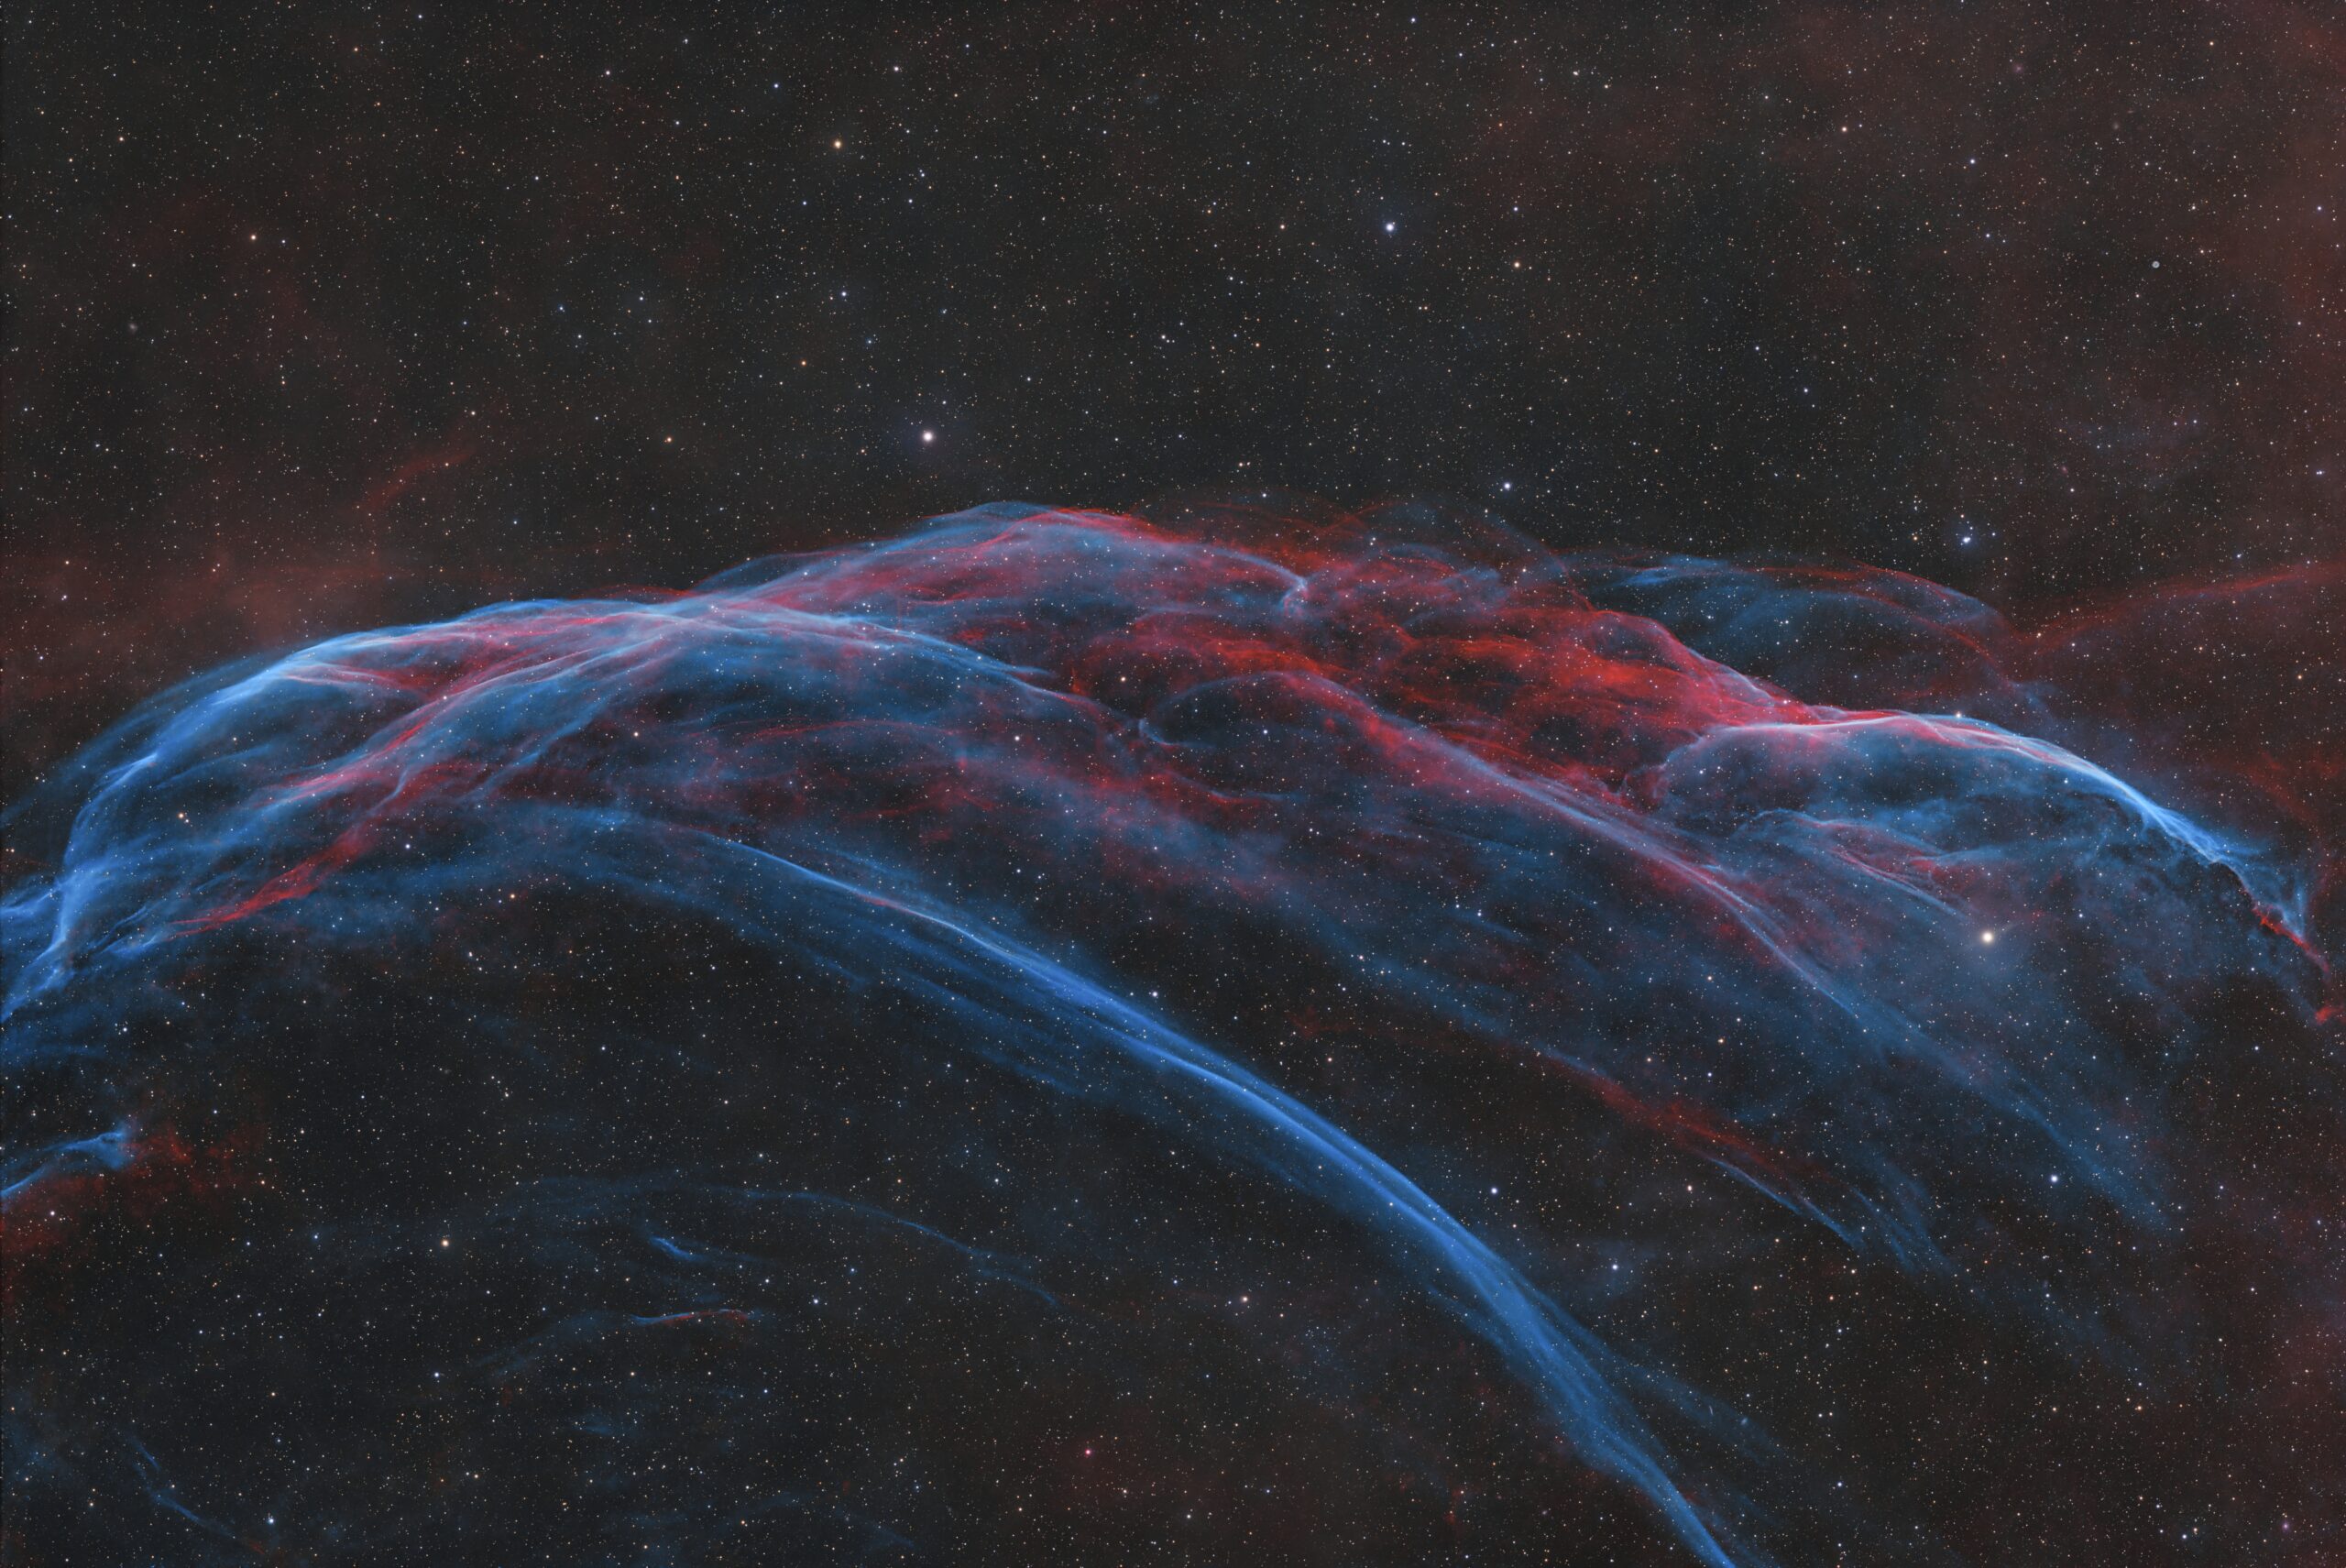
I will soon write a guideline where I explain my processing workflow for astro-images There I will delve deeper into the subject.
In short, astrophotography images are real, but like any form of photography, they require processing to make the most of the data captured. The image you see is not just a raw photograph; it’s the result of a complex process of data gathering, image stacking, noise reduction, and detail enhancement. Each step involves scientific principles—whether it’s improving the clarity of faint stars or enhancing the chemical emissions of a nebula.
The idea that post-processing in astrophotography is a form of "manipulation" is a common misconception. The goal is not to fabricate an image, but rather to reveal the inherent beauty that is hidden by the limitations of our equipment, human eyesight, and the vast distances involved. The final image is the result of interpreting real data captured through a telescope or camera, but enhanced in ways that reveal details that our eyes would never be able to perceive on their own.
Astrophotography is a blend of science and art, and post-processing plays a significant role in that artistic expression. By emphasizing certain features, balancing light and dark, and reducing noise, we reveal the breathtaking beauty of our universe that would otherwise remain hidden.
So, when someone asks, “Is astrophotography all Photoshop?”, the answer is: It’s not about altering reality, but about enhancing the real beauty that’s there to be discovered.
Ready to Start Your Astrophotography Journey?
Astrophotography is challenging but incredibly rewarding. Whether you're using a smartphone or a dedicated camera and telescope, you can start capturing the wonders of the night sky. With the right tools and techniques, the faintest details will be revealed, and you’ll be hooked for life.